
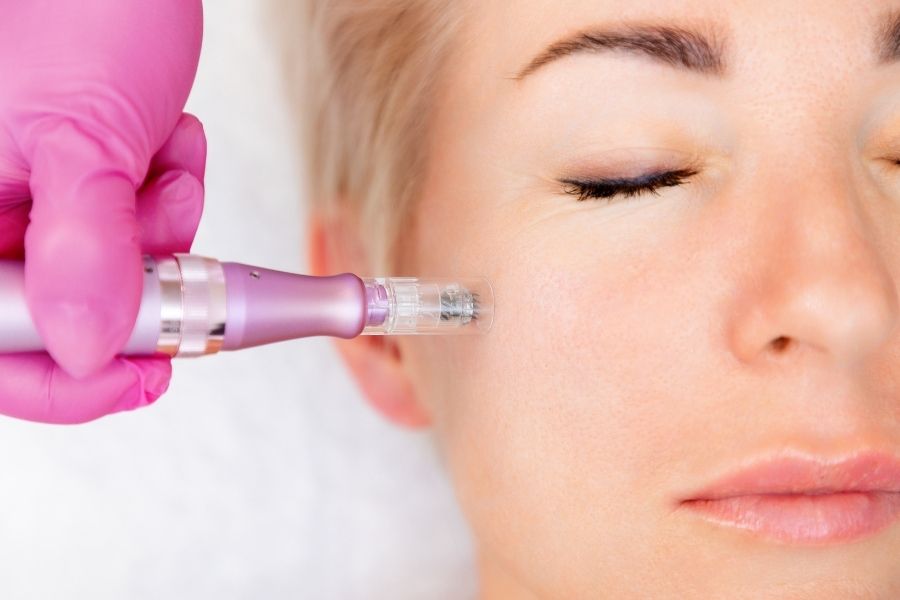
Microneedling at home sounds scary, but honestly, it’s become my favorite Sunday evening ritual. You know that feeling when your skin looks dull and tired? Those tiny needles wake it right up. What started as an expensive spa treatment has landed in bathrooms everywhere. People are getting amazing results without dropping hundreds at dermatology clinics. Your bathroom mirror might witness some pretty incredible transformations if you do this right.
Here’s the wild part: when you poke your skin with those microscopic needles, it freaks out in the best possible way. Your body thinks, “Oh no, something happened here!” and sends in the repair crew. Fresh collagen starts building, old damaged stuff gets swept away, and your skin basically gives itself a makeover. It keeps working for weeks after you finish rolling, which feels like getting bonus points for something you already did.
Understanding the Science Behind Microneedling at Home
Your skin is basically a drama queen that overreacts to tiny injuries. At-home microneedling tricks it into thinking there’s been some major emergency when really, you just rolled some needles across your face. Scientists call it “controlled wound healing,” but I think of it as giving my skin a really good pep talk with hardware.
The whole process happens in three stages that sound way more complicated than they actually are. First, your skin gets all inflamed and sends extra blood to the area. Then it starts building new stuff like collagen and elastin. Finally, it spends months reorganizing everything into something better than what was there before. Derma roller benefits aren’t just surface level either.
Studies show that people can boost their collagen production by 400% in just four weeks. That’s like turning your skin’s factory up to maximum speed. Your favorite serums also work way better because those tiny holes let everything soak in deeper. We’re talking 90% better absorption, which means you might actually see results from those expensive bottles collecting dust on your bathroom counter.
The Cellular Regeneration Process
Picture millions of tiny construction workers living in your skin. When you microneedle, you’re basically ringing the fire alarm at their job site. These workers, called fibroblasts, drop everything and start churning out fresh collagen like their lives depend on it. They also tear down the old, damaged stuff that’s been making your skin look tired.
Blood vessels start sprouting like crazy during this phase. More blood means more oxygen and nutrients getting delivered exactly where your skin needs them most. Your skin also speeds up its natural shedding process, getting rid of dead cells faster while showing off the bright, healthy skin underneath. It’s like your face is getting a complete renovation, one microscopic injury at a time.

Essential Equipment for Safe Microneedling at Home
Buying cheap microneedling tools is like getting a haircut with kitchen scissors. Sure, it might work, but do you really want to risk it on your face? Professional derma rollers made for home use typically have needles between 0.25mm and 1.0mm long. For beginners, 0.5mm hits that sweet spot where you get results without feeling like you’re torturing yourself.
Your shopping list should include a quality derma roller, rubbing alcohol for cleaning, a gentle face wash, and some good serums for afterward. Microneedling tools range from “this will destroy your face” to “wow, this actually works really well.” Spending a little more on medical-grade equipment saves you from potential disasters and actually gets you the results you’re after.
Don’t even think about sharing your roller with anyone else. These things create tiny wounds and can carry stuff you definitely don’t want spreading around. Replace your roller every few months because dull needles drag instead of puncture, which can irritate your skin or leave you with scratches instead of benefits.
Selecting the Right Needle Length
Needle length isn’t a “longer equals better” situation. At-home beauty treatments work best when you match the tool to your experience level and skin sensitivity. Start with 0.25mm needles if you’re new to this whole thing. They’re gentle enough for sensitive skin but still give you that healthy glow and better product absorption.
Once you’re comfortable and your skin stops looking like you wrestled with a cactus, 0.5mm needles can tackle fine lines and mild acne scars. Some brave souls graduate to 0.75mm or 1.0mm, but honestly, most people get great results staying in the shorter range. Consistency beats aggression every single time with this stuff.
Medical-grade microneedling devices cost more because the needles stay sharp longer and won’t bend or break off in your skin. Cheap knockoffs often have blunt or weirdly shaped needles that scratch instead of puncture. Your face deserves better than bargain-bin torture devices.
Proper Preparation Techniques
Getting ready for microneedling at home is like prepping for surgery, except way less dramatic and you get to do it in your pajamas. Your skin needs to be completely clean, no makeup, no oils, nothing that might interfere with the process. I double-wash because I’m paranoid about bacteria, but a thorough single cleanse works if you’re not as neurotic as me.
Sterilizing your equipment isn’t optional, it’s mandatory. Soak that roller in rubbing alcohol for at least 10 minutes before every use. I know it seems excessive, but infections from dirty needles are not a cute look. Even if your roller looks clean, microscopic nasties could be hanging out waiting to ruin your day.
Set up your workspace like you’re performing actual medical procedures. Good lighting helps you see what you’re doing. Have everything within arm’s reach: clean towels, aftercare products, extra alcohol for mid-session touch-ups. You don’t want to be fumbling around with needles in your face.
Creating the Ideal Environment
Evening sessions work best because your skin goes into repair mode while you sleep. DIY microneedling takes time, so pick a night when you’re not rushed. There’s nothing worse than hurrying through something that involves repeatedly stabbing your face with tiny needles.
Cool, dry air makes the whole process more comfortable. Steamy bathrooms make you sweat, which isn’t great when you’ve got fresh micro-wounds on your face. I learned this the hard way after microneedling right after a hot shower. Not my brightest moment.
Step-by-Step Microneedling at Home Guide
Starting your microneedling at home journey feels intimidating, but breaking it down makes it manageable. Divide your face into sections: forehead, each cheek, chin, and maybe around your eyes if you’re using short needles. This keeps you from getting overzealous in one spot while neglecting others.
Roll in one direction only. Seriously, don’t go back and forth like you’re mowing grass. Proper microneedling technique means lifting the roller completely off your skin before changing directions. Create a crosshatch pattern to make sure you hit everything evenly. It’s methodical, almost meditative once you get the hang of it.
How many passes depends on your needle length and pain tolerance. Beginner microneedling usually means 4-6 passes per section with short needles. Your skin should look slightly pink, like a mild sunburn, not angry red like you fell asleep on the beach. If it hurts more than you can handle, stop and reassess.
Mastering the Rolling Technique
Pressure matters more than you’d think with microneedling at home. Too light and nothing happens. Too heavy and you’re basically giving yourself tiny cuts. Find that middle ground where the needles penetrate consistently without making you wince. It should feel uncomfortable but not painful.
Direction changes keep things interesting and effective. Roll vertically on your forehead, horizontally across cheeks, diagonally around your jawline. Keep your speed steady and don’t press harder over problem areas. Your enthusiasm might want to attack those stubborn spots, but your skin will thank you for restraint.
Post-Treatment Application Protocol
Right after microneedling at home, your skin becomes a super-absorber for about four hours. This is when you want to slather on your best serums. Hyaluronic acid, vitamin C, peptides – anything with small molecules that can slip through those temporary channels you just created.
Skip the harsh stuff for at least two days. No retinoids, no acids, nothing that might irritate freshly treated skin. Gentle skincare products are your friends right now. Your skin is doing hard work healing itself, so don’t make its job harder with aggressive ingredients.
Safety Precautions and Common Mistakes
Microneedling at home safety goes beyond just cleaning your tools, though that’s still super important. Never roll over active breakouts, cuts, or irritated patches. You’ll spread bacteria around and make everything worse. Trust me, patience pays off here.
Common microneedling mistakes usually involve too much enthusiasm. Pressing too hard, doing too many passes, skipping aftercare – these rookie errors can turn a beneficial treatment into a painful lesson. Your skin should look like you have a mild sunburn, not like you stuck your head in a beehive.
Never, ever share your derma roller. These things create tiny wounds and can harbor seriously dangerous stuff that no amount of cleaning fixes. Keep your microneedling tools personal and replace them regularly. Most manufacturers recommend every 3-4 months with normal use.
Recognizing When to Stop
Your skin talks to you during microneedling at home sessions if you know how to listen. Mild tingling and light pinkness mean you’re doing it right. Burning, serious pain, or bright redness mean stop immediately and figure out what went wrong.
Sensitive skin microneedling requires extra attention to these warning signs. Some people’s skin just needs a gentler approach to get the same great results. Start slow, build tolerance gradually, and remember that marathon mentality beats sprint aggression every time.
Frequency and Maintenance Schedules
Finding the right rhythm for microneedling at home is like figuring out your workout schedule. Professional dermatologists usually suggest starting with sessions every 2-3 weeks for beginners using short needles. This gives your skin time to heal and rebuild between rounds.
As you get more experienced and your skin toughens up, you might roll weekly with short needles or stick to bi-weekly with longer ones. Consistent skincare routines that include microneedling blow sporadic aggressive sessions out of the water. Think of it like training – gradual progress beats weekend warrior intensity.
Your skin will tell you what works best. Some people love monthly sessions with longer needles, others prefer gentle weekly maintenance. Pay attention to how long your skin takes to bounce back after each session. That recovery time reveals your natural healing rhythm.
Tracking Your Progress
Documenting your microneedling at home journey helps you figure out what actually works for your skin. Take photos in the same lighting before you start, then monthly after that. These visual records help you adjust your technique and frequency based on real results, not just how you feel that day.
Keep notes about needle length, number of passes, products used, and how your skin reacted. Personalized skincare approaches based on actual data consistently beat generic routines because they account for your skin’s quirks and preferences. You’ll start noticing patterns in what works and what doesn’t.
Aftercare and Recovery Protocols
The 24-48 hours after microneedling at home determine whether you get amazing results or end up with regrets. Your skin is basically walking around without its usual armor, so treat it like the delicate flower it temporarily becomes. Gentle care during this window makes all the difference.
Hydration becomes your skin’s best friend during recovery. Hyaluronic acid serums feel amazing on freshly treated skin and don’t cause irritation. Slather them on generously and reapply whenever your skin feels tight or dry. Skip makeup for at least 12 hours to let your skin start healing without clogged pores.
Sun protection isn’t optional during recovery – it’s absolutely critical. Freshly microneedled skin burns faster and can develop dark spots if you’re not careful. SPF 30 or higher becomes your constant companion, even for quick trips outside or sitting by windows. Your skin’s temporary vulnerability could undo all your hard work if you’re careless.
Managing Side Effects
Normal microneedling at home side effects include redness, slight swelling, and sensitivity that disappears within a few days. Your skin might feel tight or look a bit flaky as it speeds up cell turnover. Resist the urge to pick at any peeling – that’s just your skin showing off its improved renewal process.
Managing microneedling side effects is mostly about patience and gentle care. Cool compresses help with any lingering puffiness, while avoiding hot showers and intense workouts prevents extra irritation. Your skin knows how to heal itself – you just need to create the right environment for it to work.
Expected Results and Timeline
Microneedling at home results sneak up on you gradually, with first improvements usually showing up within 2-4 weeks. Your skin’s texture starts smoothing out, pores look smaller, and you get this overall glow as cell turnover picks up pace. Realistic expectations help you appreciate these subtle changes while staying motivated for the long haul.
The real magic happens between 8-12 weeks when accumulated collagen production starts showing obvious improvements. Long-term skincare benefits keep developing for months after you establish a routine. Some people report continued improvements even after a full year of regular sessions.
Results vary wildly between people based on age, skin type, lifestyle, and how consistently you stick with it. Younger skin usually responds faster because cellular regeneration is already running at higher speeds. Mature skin might take longer to show changes but often gets more dramatic transformations once results kick in.
Setting Realistic Expectations
Microneedling at home works great, but it’s not magic. Deep acne scars, serious sun damage, and advanced aging signs need professional treatment or way more time than most people want to invest. Focus on achievable goals like better texture, enhanced radiance, and gradual fine line improvement.
Comparing your results to other people’s experiences is a fast track to disappointment. Individualized skincare results depend on factors beyond your control, so track your own progress instead of stalking before-and-after posts online. Celebrate small wins and trust that consistent effort pays off over time.
Your microneedling at home journey is an investment in long-term skin health, not a quick fix for immediate concerns. The best results come from patience and consistency, not aggressive approaches or unrealistic timelines. Your skin will reward this gentle persistence with improvements that build beautifully over months and years.
Ready to start poking your way to better skin? Just remember – your current skin concerns didn’t happen overnight, so give your skin the time it needs to work its magic!