
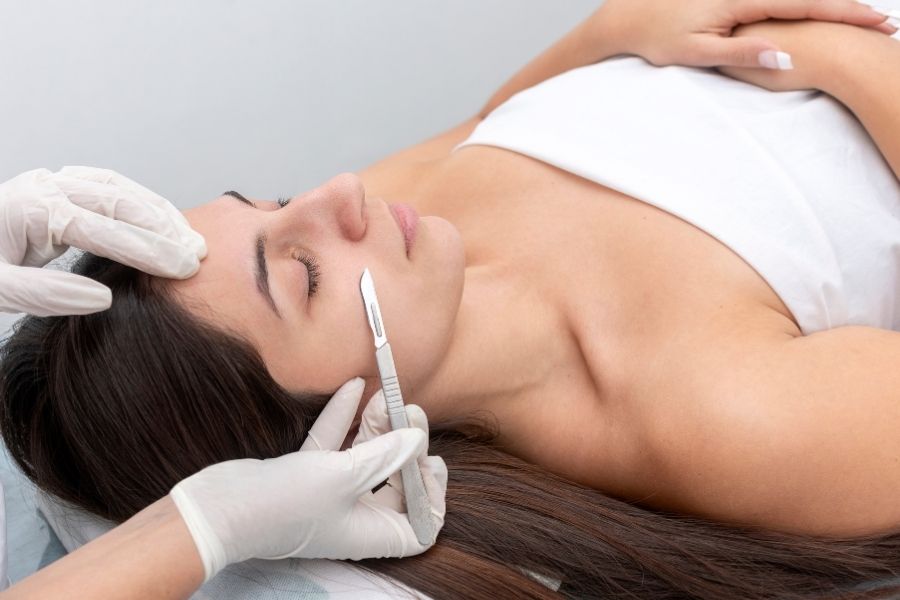
Picture this: you’re staring at your reflection, running your fingers across skin that feels like silk and glows like you’ve just stepped out of a luxury spa. This isn’t fantasy – it’s what happens when professional dermaplaning techniques are done right. But here’s the thing that keeps me up at night – one slip with that surgical scalpel, and you could be looking at nicks, cuts, or permanent scarring.
I’ve watched too many practitioners jump into dermaplaning thinking it’s just fancy shaving. Trust me, it’s not. This exfoliation treatment has been around for centuries, passed down from barbers to high-end salons, and there’s a reason some people make it look effortless while others… well, let’s just say their clients don’t come back.
The difference between a master and someone who’s about to mess up your face? It’s not expensive equipment or years of experience. It’s understanding how blade angle, pressure, and skin tension work together. Whether you’re an esthetician wanting to up your game or someone thinking about this treatment, you can’t just wing it.
What’s Really Happening When You Dermaplane
Let’s talk about what professional dermaplaning techniques actually do to your skin. You’re not just scraping stuff off – you’re using a 10-gauge surgical scalpel at exactly 45 degrees to remove the stratum corneum, which is basically your skin’s old, dead top layer.
Think of your skin like an old book. Dermaplaning carefully peels away those worn, yellowed top pages to reveal the crisp, fresh ones underneath. You’re getting rid of dead skin buildup and that peach fuzz everyone pretends they don’t have, creating this incredibly smooth surface that makes your skincare products actually work better.
Here’s where people mess up: they think harder equals better. Wrong. Safe dermaplaning practices mean you never go deeper than that superficial layer. The second you dig deeper, you’re in scar territory, and nobody wants that conversation with a client.
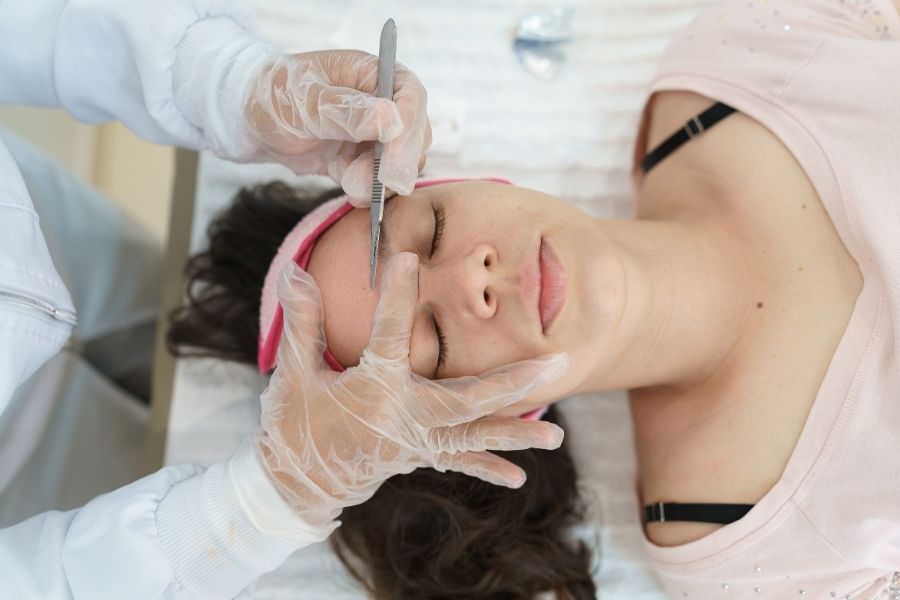
Getting Your Blade Game Right professional dermaplaning techniques
Professional dermaplaning isn’t about muscle – it’s about finesse. The blade should glide like you’re spreading butter on warm toast. Too much pressure and you’ll tear the skin. Too little and you’re basically just tickling them with an expensive knife.
I learned about “feather touch technique” the hard way. Advanced dermaplaning methods teach you to hold that scalpel with a relaxed grip, letting the blade’s sharpness do the heavy lifting. Your hand moves in smooth, continuous strokes – never stop halfway through or you’ll create uneven patches that look terrible.
Direction matters more than most people realize. Always go with the hair growth, moving up and out. It’s like mowing grass – you want clean, even passes without creating those cross-hatch patterns that irritate skin and make you look like an amateur.
Prep Work That Actually Matters
Before that blade touches anything, you need to get your setup right. This isn’t the time to cut corners. Dermaplaning facial techniques live or die by preparation.
First, do a real skin analysis. I’m talking about looking for breakouts, irritation, cuts, infections – anything that screams “don’t touch me with a sharp object today.” Dermaplaning over problem skin is like trying to perform surgery in your garage. Just don’t.
The skin needs to be squeaky clean and bone dry. I always double cleanse – oil-based first to get rid of makeup and sunscreen, then water-based to catch whatever’s left. If there’s any slippery residue, your blade control goes out the window.
Setting Up Your Space professional dermaplaning techniques
Your lighting setup can make or break this whole thing. I’ve seen practitioners squinting under bad overhead lights, missing spots and creating uneven results. You need bright, even lighting from multiple angles – shadows are your enemy here.
Room temperature matters too. Too warm and you’re dealing with oily skin that’s hard to work with. Too cold and the skin gets tight and unforgiving. Professional-grade dermaplaning means controlling every variable you can.
The Art of Angles and Pressure
That 45-degree angle everyone talks about? It’s not some random number. Expert dermaplaning techniques use this angle because it’s the sweet spot where you can remove dead skin and hair without digging into healthy tissue.
But here’s what they don’t tell you in basic training – different face areas need different approaches. Your forehead can handle the full 45 degrees, but around the eyes? You might need to dial it back to 35-40 degrees. The skin there is paper-thin and unforgiving.
I’ve developed what I call “micro-adjustments” – tiny changes in blade position for each face area. What works on the cheeks won’t work on the jawline, and the lip area needs a completely different game plan.
Learning to Read the Skin professional dermaplaning techniques
After doing this for years, you develop this sixth sense about how skin responds to the blade. Healthy skin has a certain resistance – it shouldn’t feel like cutting through butter, but it also shouldn’t feel like scraping concrete.
When the blade glides too easily, you’re probably not making good contact with the dead skin layer. If you’re fighting against serious resistance, you’re either pressing too hard or going against the grain. Professional dermaplaning techniques are all about this constant feedback between you and the client’s skin.
Listen to the sound too. Proper dermaplaning has this gentle, consistent scraping noise. Any change in that rhythm means something’s wrong. Squeaking usually means your blade is dull. Scratching means you’re being too aggressive.
Breaking Down Each Face Zone
Every area of the face is different when it comes to dermaplaning procedures. You can’t use the same approach everywhere and expect good results.
I always start beginners on the forehead because it’s the most forgiving. It’s relatively flat, and you can practice your stroke technique without too much drama. Work in sections with gentle upward strokes from eyebrows to hairline.
The Eye Area Demands Respect professional dermaplaning techniques
The skin around the eyes is where careers are made or broken. This area is significantly thinner than anywhere else on the face. I tell my students to cut their pressure in half and use shorter strokes.
Never, and I mean never, try to dermaplane the upper eyelid or directly under the eye. Stick to the outer corners and the area between the eyebrow and eye socket where the skin can actually handle the treatment.
The cheeks give you the most room to work, but don’t get cocky. Work in sections from temple to nose, then ear to center face. The natural curve means you’re constantly adjusting your hand position to maintain that blade angle.
Navigating the Tricky Spots
The nose is where things get interesting. The bridge can handle standard technique, but the sides require serious attention. The skin thickness varies dramatically, and you can’t just power through it.
Around the nostrils, I switch to much shorter strokes and barely any pressure. This area gets ingrown hairs easily and can be super sensitive. Never try to get fancy around the actual nostril openings.
The chin and jawline trip up a lot of people because hair growth patterns are all over the place. Some people have hair that grows straight down, others have these swirling patterns that require multiple approaches.
Mistakes That’ll Get You in Trouble professional dermaplaning techniques
Even experienced people make stupid mistakes with professional dermaplaning techniques. The biggest one? Going over the same spot twice because you don’t think you got enough off the first time.
This “double-pass temptation” is how you end up with over-exfoliated, irritated skin. One pass per area, period. No exceptions.
Using dull blades is another way to mess up your reputation fast. A sharp blade needs almost no pressure and glides smoothly. A dull blade forces you to press harder, creating friction and increasing your chances of cutting someone.
Pressure and Speed Problems
Some people think dermaplaning is like power washing a deck. It’s not. Safe dermaplaning practices mean the blade barely touches the skin surface. If you’re pressing hard enough to leave white marks, you’re doing it wrong.
Speed kills too. Each stroke should take about 2-3 seconds. This gives you time to adjust for bumps, moles, or any other surprises you encounter. Rushing leads to accidents, and accidents lead to very unhappy clients.
Working on the wrong skin types is career suicide. Active acne, recent chemical peels, retinoid use – these are all red flags that mean you should be doing something else that day.
What Happens After You’re Done professional dermaplaning techniques
The real test of professional dermaplaning techniques isn’t how smooth the skin looks right after treatment – it’s how well it heals over the next few days.
That freshly dermaplaned skin is basically a newborn baby. The protective layer is gone, leaving vulnerable new skin cells exposed to everything in the environment. The next 24-48 hours determine whether your client comes back singing your praises or warning their friends about you.
I always apply a gentle, fragrance-free moisturizer immediately after treatment. Look for ceramides, hyaluronic acid, or niacinamide – stuff that helps healing without causing irritation. Skip anything with retinol, acids, or vitamin C for at least 48 hours.
Sun Protection Isn’t Optional
Post-dermaplaning skin burns faster than paper in a campfire. Even a quick trip to the mailbox can result in hyperpigmentation or delayed healing. Safe dermaplaning practices include scaring your clients about sun exposure for the next two weeks.
I recommend broad-spectrum SPF 30 minimum, and I make them promise to reapply throughout the day. Physical sunscreens with zinc oxide or titanium dioxide usually work better than chemical ones on freshly treated skin.
Keep the skincare routine simple for the first few days. Gentle cleansing, light moisturizer, and religious sun protection. That’s it. Less is more when your skin is healing.
Getting Good at This Takes Time
You don’t become a dermaplaning expert overnight. Professional dermaplaning techniques require the same dedication as learning to play piano or perfecting your golf swing. Practice, patience, and respect for what can go wrong.
Start with balloons, fruit peels, or training mannequins before you touch a human face. Focus on maintaining consistent angle and pressure across different surfaces. Get your muscle memory down first.
When you start working on real people, stick to easy areas like the forehead and cheeks. Save the challenging stuff around the eyes and nose until you’ve built up your confidence and skills.
Advanced dermaplaning methods mean never stopping your education. Go to workshops, find mentors, stay current with new techniques. This field changes constantly, and falling behind isn’t just bad for business – it’s potentially dangerous.
Know When to Say No professional dermaplaning techniques
One of the most important skills in safe dermaplaning practices is recognizing when not to do the treatment. Some skin conditions, medical histories, or unrealistic expectations make dermaplaning a bad idea.
Don’t let ego or money pressure you into working beyond your skill level. It’s better to build slowly and maintain a perfect safety record than to push too hard and hurt someone. Your reputation is worth more than any single treatment fee.
Mastering dermaplaning is different for everyone, but some things never change: respect the skin, prioritize safety, and never stop learning. Professional dermaplaning techniques combine technical skill with artistic sense – you need both steady hands and good judgment.
Even after years of doing this, every face teaches me something new. Every client presents different challenges and opportunities to get better. Stay humble, remember that someone’s trusting you with their appearance, and never forget how much damage a sharp blade can do in careless hands.